和我一起入坑-Angular入门-Angular版的ToDoList
本项目是仿照这个做滴 ToDoList 。使用angular实现这个代办事项功能。
(一) 基本功
入坑前不得先看看文档嘛,Angular quickstart 。
然后开撸~
- 前置项
安装Node ,需要注意版本,node 6.9.x 和 npm 3.x.x。 - 然后全局安装 Angular CLI 。
1
npm install -g @angular/cli
- 创建项目
1
ng new ng-first
- 启动开发服务器浏览器自动打开 http://localhost:4200/ ,看到了ng的标,是不是好激动 (手动滑稽)。
1
2
cd ng-first
ng serve --open - 创建组件
这个操作会直接创建文件,并在根组件配置。1
ng g component components/todolist
- 创建服务
保持队形,再来一个。1
ng g service services/storage
- 小试牛刀, 打个招呼
按照国际惯例,先来问个好!
在app.component中插入自定义组件app-todolist,这个名字取决于 todolist.component.ts中selector: ‘app-todolist’。继续,在todolist.component.ts中定义一个变量msg,这种语法是ts的默认套路。 (手动捂脸,其实我也不太会ts啦)1
2<!--app.component.html-->
<app-todolist></app-todolist>在todolist.component.html中绑定数据1
2
3
4
5
6
7
8
9
10//todolist.component.ts
export class TodolistComponent implements OnInit {
public msg: any = 'Hello World !';
constructor() { }
ngOnInit() {
}
}1
2//todolist.component.html
<h3> {{msg}} </h3>切到浏览器,噔噔噔噔!1
2
3
4
5/*todolist.component.css*/
h3{
text-align: center;
color: #369;
} 哇咔咔,下面开始进入正题。
(二)html和css部分
这个不重要,不是本文重点,打开控制台抄一抄就好了(好不要脸呀)。
这是html,直接复制到todolist.component.html,去掉一些用不到得代码。
1 | <!--todolist.component.html--> |
这是css样式,直接复制到todolist.component.css,把body的样式复制到src目录下的styles.css。
1 | /*todolist.component.css*/ |
1 | /*src/styles.css*/ |
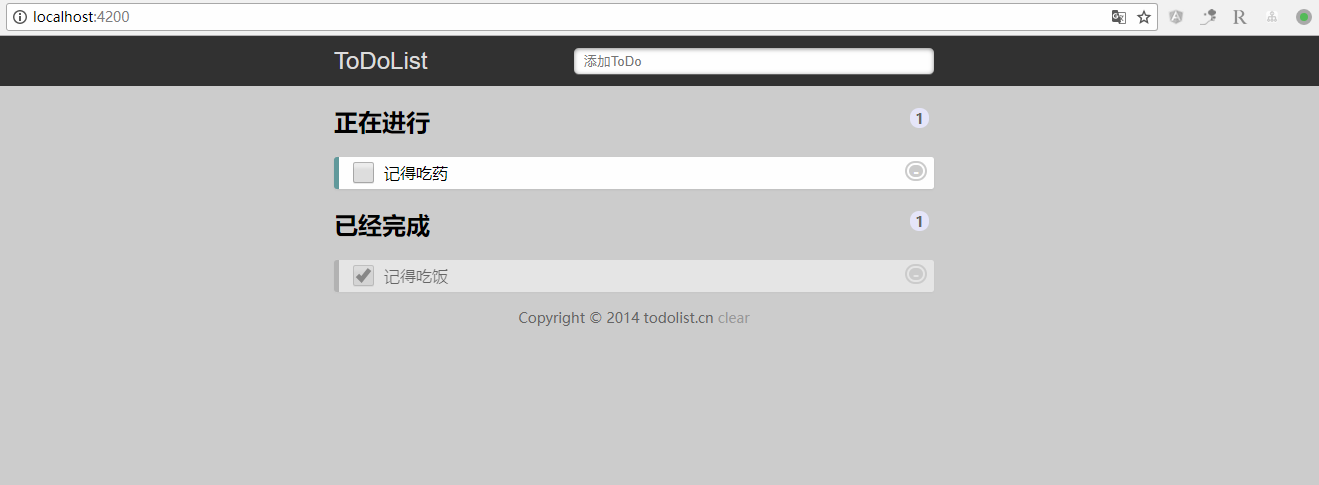
复制完之后,页面应该长这样。

好了,以上是不必要的前戏 (手动滑稽)。
(三)实现ToDoList的功能
研究 ToDoList 上的js源码,大概的逻辑就是用户输入待办事项后,添加一个done属性,默认值为false,表示正在进行;点击完成按钮,done属性变为true,表示已经完。且可以删除。浏览器刷新后,数据仍然存在,因为使用了HTML5的localStorage。
添加代办事项的功能
声明todo变量
1 | //todolist.component.ts |
1 | <!--todolist.component.html--> |
[(ngModel)]是一个Angular语法,用于把todo绑定到输入框中。 它的数据流是双向的:从属性到输入框,并且从输入框回到属性。
到这一步的时候,控制台报错。
解救的办法就是我们必须选择使用FormsModule模块。
1 | import { BrowserModule } from '@angular/platform-browser'; |
循环添加的事项
添加内置指令*ngFor,循环列表。
1 | <h2>正在进行 |
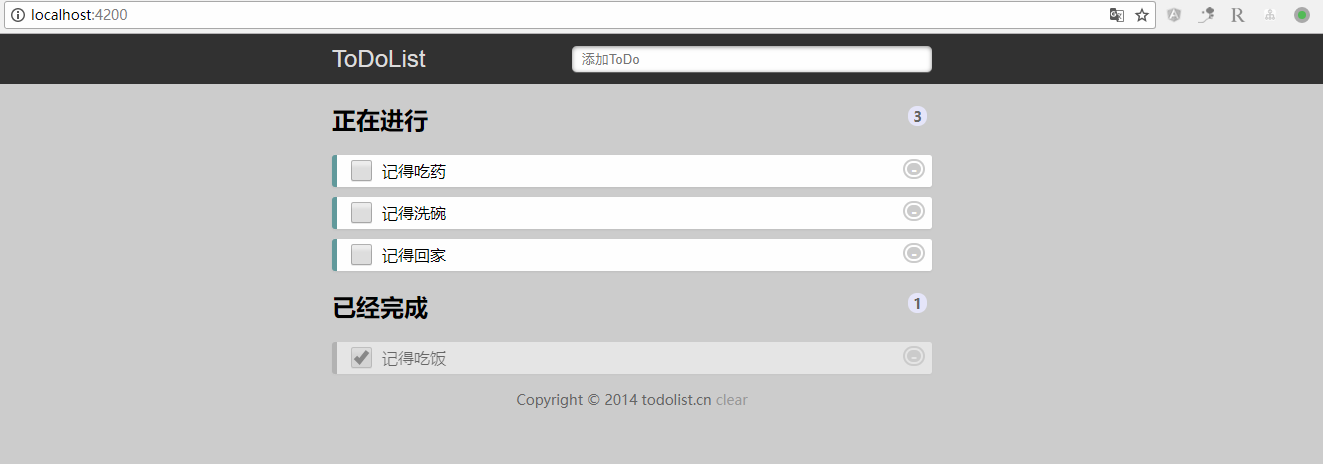
能看到添加的事项咯。

切换事项完成与否以及删除该事项
绑定changeTodo、deleteTodo事件
1 | <h2>正在进行 |
将添加的事项和已完成的事项分为两个数组,(或者放在一个数组里,然后根据done的值来控制是否显示),但是我觉得分两个比较容易操作。
1 | public doneList = []; //再声明一个已完成的数组 |
到此,这个功能就算完成啦~
等等,刷新页面,欧漏,刚刚输入的事项不见了。
这个时候,localStorage闪亮登场!!
创建StorageService服务
为了不再把相同的代码复制一遍又一遍,我们要创建一个单一的可复用的数据服务,并且把它注入到需要它的那些组件中。
在(一) 基本功中第6步,创建服务时,angular-cli已经帮我们生成了一个服务的基本结构。
创建服务,方便在任何地方使用。
1 | //storage.service.ts |
使用该服务,只需要注入它。
1 | //todolist.component.ts |
好了,我们就可以轻松愉快的使用它了。
将数据存到localStorage
使用this.storage就可以使用封装好的服务。
每次操作数据后都要存一遍。是不是有点鸡肋~
1 |
|
初始事件
OnInit接口的钩子方法叫做ngOnInit, Angular在创建组件后立刻调用它。
我的理解就是,类似于vue中的mounted?
1 | ngOnInit() { |
然后,大功告成!
还有页脚的clear按钮
1 | <!--todolist.component.html--> |
1 | clearData() { |
说在后面的话
还有拖拽排序的的功能,不写了。
完整的项目在这里GitHub。